
How to Install Composite Decking
Quick answer: To install composite decking, prepare a level, well-drained base, build a straight frame with joists at the spacing the board manufacturer specifies, then fix the boards with hidden clips or approved screws. Leave expansion gaps at board ends and against walls, keep air flowing under the deck, and finish the edges with fascia and edge boards. Always follow the installation guide for your specific product and your local building rules.
Composite decking is friendly to install. The boards are consistent, they cut with ordinary woodworking tools, and hidden clip systems set the gaps for you. But composite behaves differently from timber in two important ways: it moves with temperature, and it is less stiff between supports. Most installation problems come from ignoring one of those two facts.
This guide covers a typical ground-level or low deck. Raised decks, balconies and roof terraces usually need engineered designs and permits, so check with a qualified professional and your local authority first.
Important: Spans, gaps and fixings differ between products. The figures below are typical values to help you plan. Your board’s installation guide always takes priority.

A careful frame and the right clips are the foundation of a flat, long-lasting deck.
Tools and Materials
Tools
- Tape measure, chalk line and pencil
- Spirit level (long and short) and string line
- Mitre saw or circular saw with a fine-tooth carbide blade
- Cordless drill and driver, with drill bits for pilot holes
- Speed square or carpenter’s square
- Safety glasses, hearing protection, gloves and a dust mask
Materials
- Composite deck boards, with a cutting allowance of 5–10% (more for diagonal or picture-frame layouts)
- Joists and bearers: aluminium, composite or treated timber
- Footings, adjustable pedestals or concrete pads
- Hidden clips, starter clips and stainless steel screws
- Edge boards or end caps, fascia boards and stair parts
- Weed membrane and gravel for ground-level decks
Browse matching decking accessories so colours and fixings are compatible with your boards.
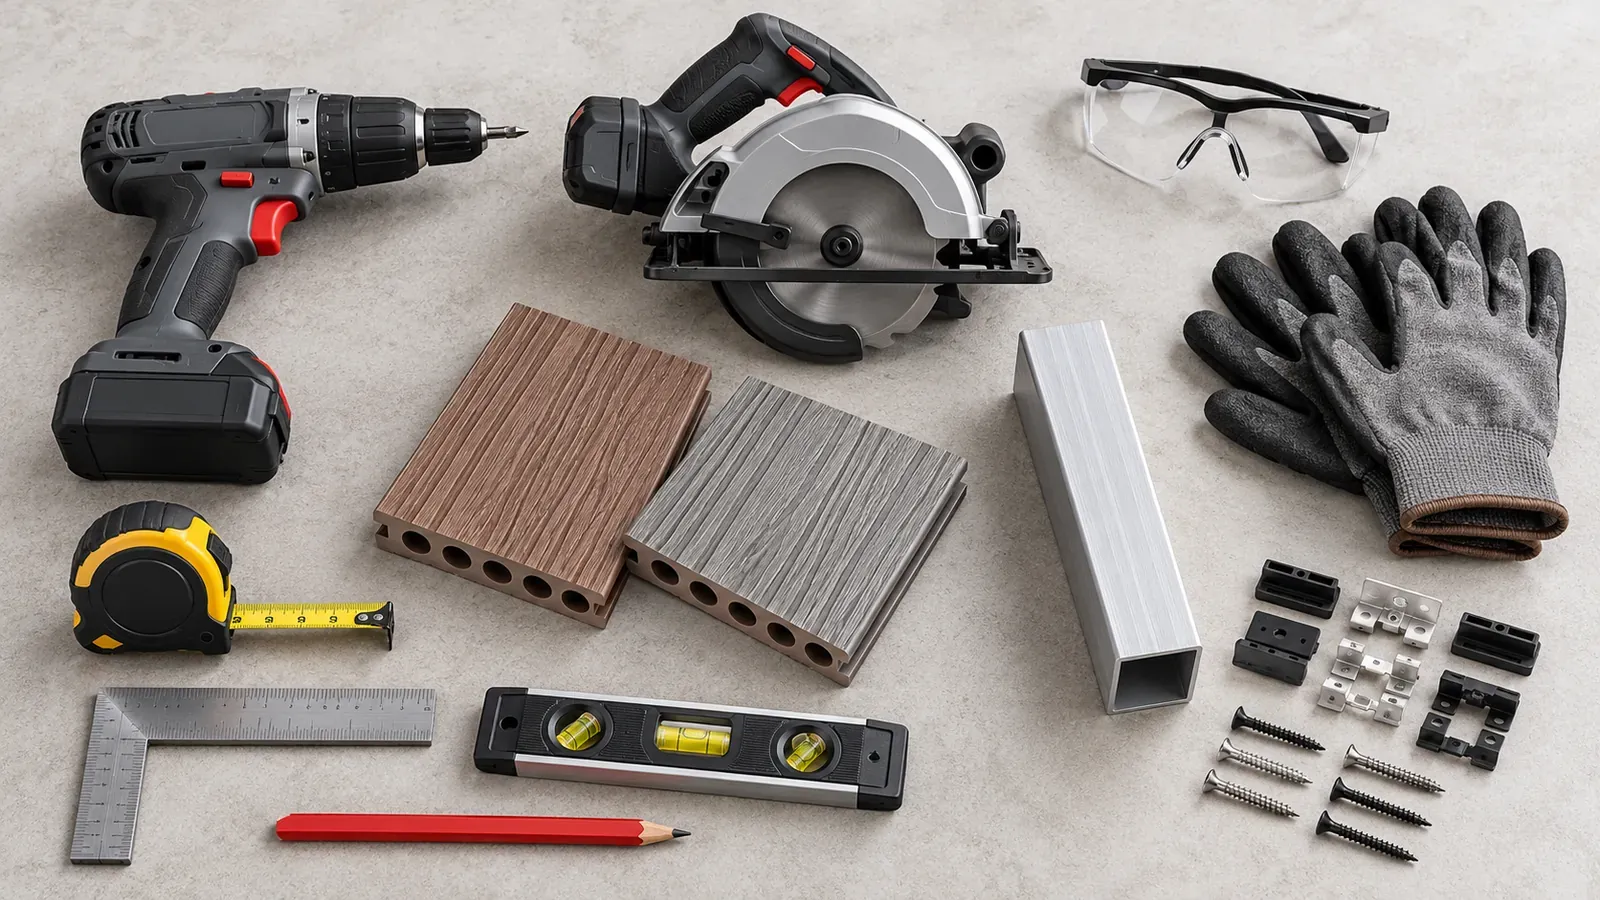
Have every tool, clip and accessory on site before you cut the first board.
Before You Start
- Check local rules. Height, distance from boundaries and planning permission rules differ by area.
- Store boards correctly. Keep them flat on a level surface, supported every 600 mm or so, and covered from sun and rain until you use them.
- Plan the layout on paper. Decide board direction, where joints will fall and whether you want a picture-frame border. This also tells you how many boards and joists you need.
- Check the weather. Note the temperature on installation day; it affects the gaps you leave at board ends.
Step 1: Prepare the Base
A deck is only as good as what is underneath it.
On soil or grass: remove turf and topsoil, level the area, lay a weed membrane and cover it with a layer of gravel so water drains away. Set footings or concrete pads at the positions your frame plan needs.
On concrete or paving: check that the surface is sound and drains. Never build a frame that blocks water flow. Use adjustable pedestals or packers to level the joists, and keep the frame off the slab so water can run underneath.
Allow for falls. A slight slope away from the house, typically around 1:100, helps water run off the boards rather than sitting under them.
Step 2: Build the Frame and Set the Joist Spacing
Composite boards need closer supports than many timber boards. Spacing that is too wide is the most common cause of a bouncy or sagging deck.
| Layout and use | Typical maximum joist spacing (centre to centre) |
|---|---|
| Residential, boards at 90° to joists | About 300–400 mm (12–16 in) |
| Diagonal layouts (around 45°) | About 300 mm (12 in) or less |
| Commercial and public areas | About 300 mm (12 in) or less |
| Stair treads | Usually about 200–250 mm (8–10 in) |
Use the closer end of each range for hollow boards, heavy loads and hot climates, and always confirm the figure in your product’s guide.
Further points:
- Keep joists straight and level. Run a string line and check every joist. Composite boards follow the frame; they cannot hide a twisted joist.
- Use double joists at butt joints, so each board end sits on its own support with room for the clip or screw.
- Add noggins or blocking where you need extra support, such as under picture-frame borders, around a hot tub or under planters.
- Protect timber joists with joist tape on the top edge if you use treated timber.

Straight, evenly spaced joists are what keep composite boards flat.
Step 3: Keep Air Moving Under the Deck
Composite needs ventilation. Trapped heat and moisture under a deck cause boards to move more and can lead to mould on the underside.
- Leave a clear air gap below the joists. Low decks on solid slabs are the most at risk; follow the minimum height in your product guide.
- Do not close all sides. Fascia and skirting should leave openings or a gap at the bottom so air can circulate.
- Keep the drainage clear so water never ponds beneath the frame.
Step 4: Fit the First Board
- Start at the straightest edge, usually against the house or along the front of the deck.
- Leave a gap from walls and fixed structures, typically at least 10 mm, so the boards can expand.
- Fix starter clips along the first joist line, or face-screw the first board as your system specifies.
- Check the first board is perfectly straight. Every board after it follows the first one, so take your time.
Step 5: Fix the Boards With Hidden Clips
Grooved composite boards are usually fixed with hidden clips that sit in the board edges and screw into each joist.
- Slide or place a clip into the groove of the fixed board at every joist.
- Screw the clip down, without overtightening.
- Push the next board into the clips. The clip sets the side gap, commonly around 5–6 mm.
- Repeat, checking every few rows that the boards are running straight.
Fix every board at every joist. Skipping clips to save time leads to loose boards and uneven gaps.
For solid-edged boards, edge boards and stairs, use colour-matched stainless steel face screws, and pre-drill near board ends to avoid splitting.
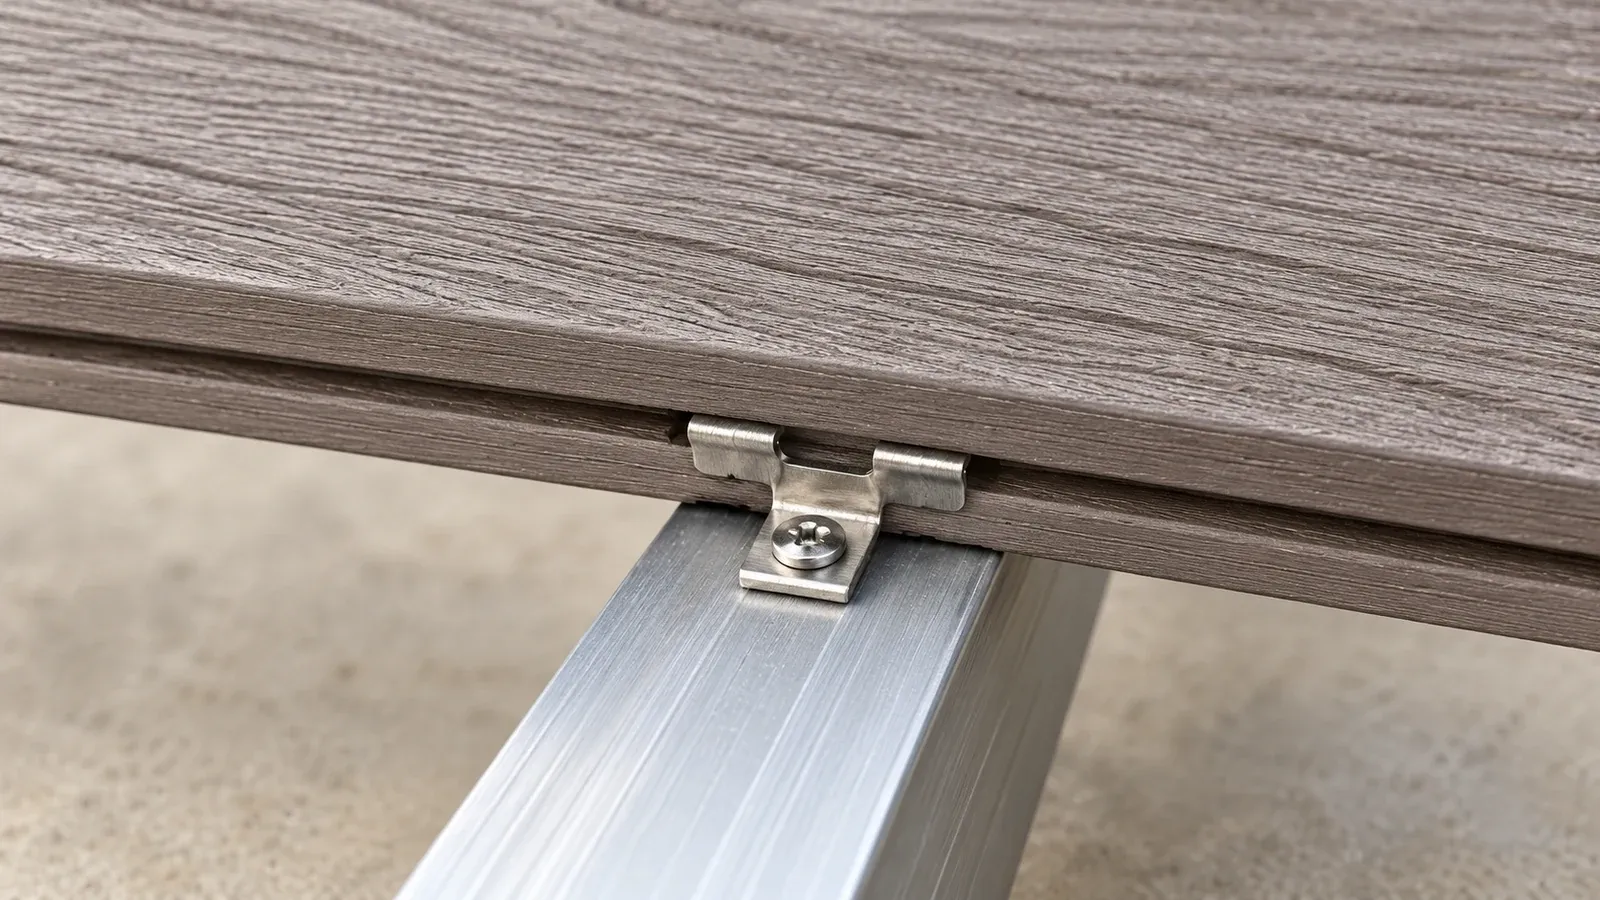
Hidden clips hold each board at every joist and set an even side gap.
Step 6: Leave Expansion Gaps at Board Ends
Composite boards get longer when they warm up and shorter when they cool down, much more along the length of the board than across it. That is why end gaps matter.
- Leave a small gap where two board ends meet, typically around 3–5 mm. Leave more when installing in cold weather (the boards will grow) and less in hot weather.
- Leave a larger gap against walls, posts and fixed edges.
- Longer boards need larger gaps, because they move more in total.
Your board’s guide will give exact gaps by temperature and board length. Follow it closely: too little gap causes boards to push against each other and bow; too much leaves open joints.
Step 7: Plan Joints and Patterns
- Stagger butt joints across the deck so they do not line up in a straight row.
- Or avoid joints entirely by choosing board lengths that match the deck, or by using a breaker board across the middle.
- Picture framing runs a border of boards around the edge, covering the board ends for a neat finish. It needs extra blocking under the border.
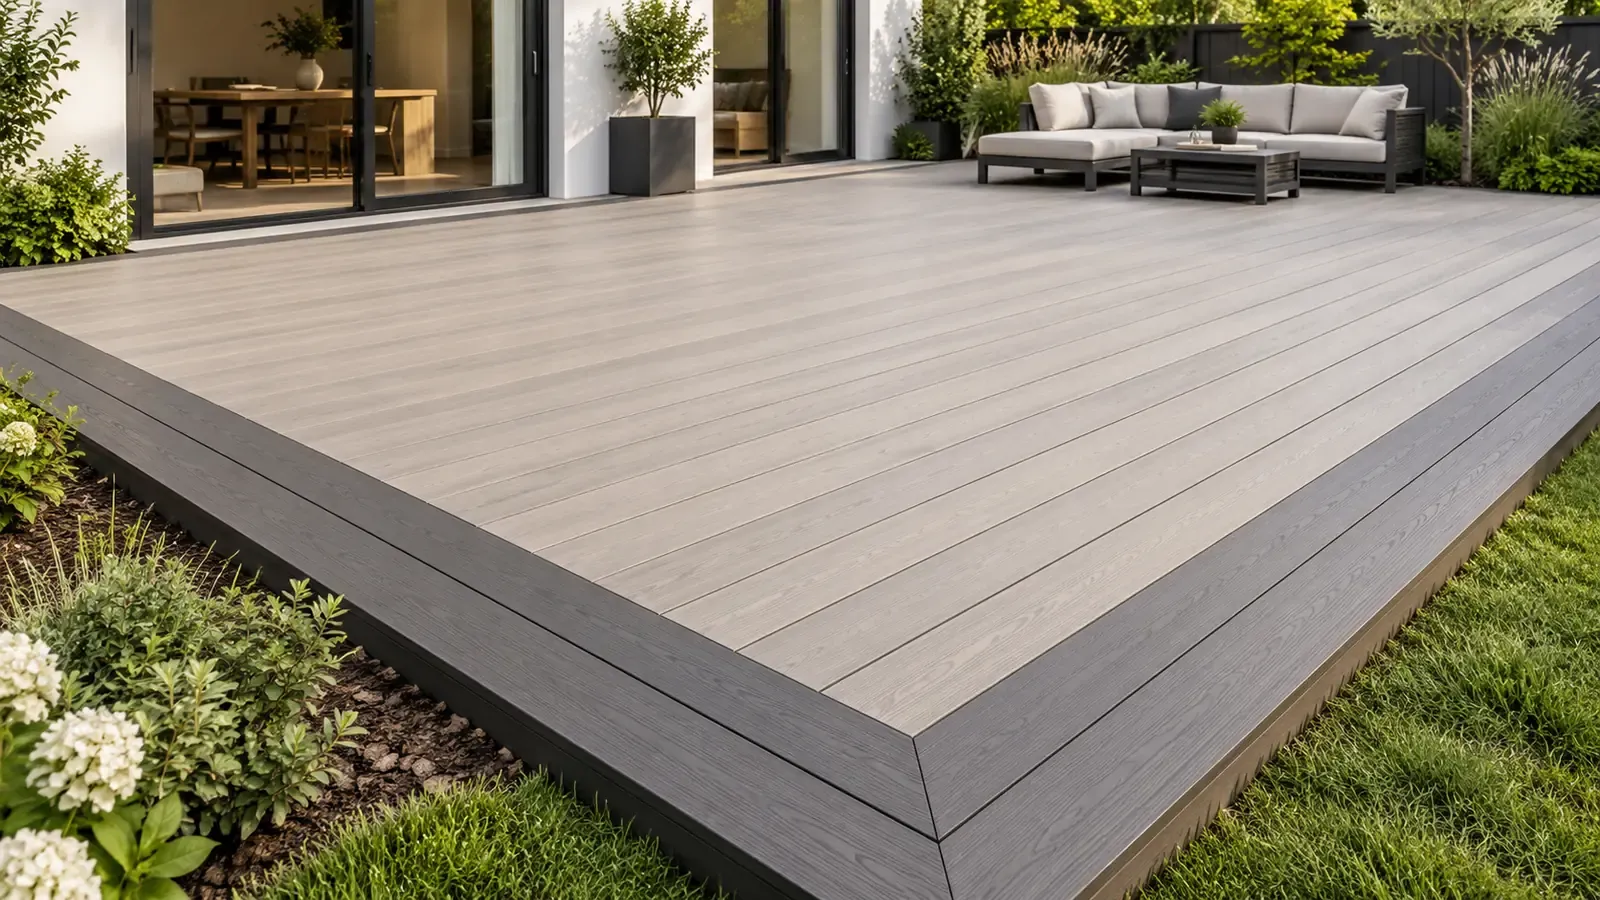
A picture-frame border hides board ends and gives the deck a finished look.
Step 8: Build the Stairs
- Use closer stringer spacing for treads than for the deck itself, typically about 200–250 mm.
- Keep every riser height and tread depth the same; uneven steps are a trip hazard.
- Fit stair nosing or an edge board on each tread, and face-screw where clips are not suitable.
- Check local rules for handrails and the maximum step height.
Step 9: Finish the Edges
- Fascia boards cover the frame and give the deck a clean edge. Fix them with screws suited to composite and leave the gaps the guide specifies.
- Edge boards or end caps cover exposed board ends, which are where hollow profiles show.
- Skirting around a raised deck should still leave room for air to flow underneath.

Fascia and edge boards in matching colours give stairs and edges a finished look.
Step 10: Clean Up and Hand Over
Sweep away sawdust and offcuts, then rinse the deck with water. Sawdust and metal filings left on the surface can mark the boards. Keep the installation guide and warranty paperwork together with the batch details printed on the packaging.
Common Installation Mistakes
- Joists too far apart, causing bounce and sagging between supports.
- No end gaps, so boards bow on the first hot day.
- Blocked ventilation on low decks, especially over concrete.
- Skipping clips at some joists to save time.
- Using screws not designed for composite, which can mushroom the surface or rust.
- Mixing boards from different batches in one area without checking colour first.
Looking After Your New Deck
Composite needs little maintenance, but not none. Wash it with water and a soft brush once or twice a year, clean grease and food spills promptly, and keep leaves and debris from collecting at the edges. Avoid metal shovels for snow and rubber-backed mats that trap moisture.
Frequently Asked Questions
What is the correct joist spacing for composite decking?
For most residential decks with boards laid at right angles to the joists, typical maximum spacing is about 300–400 mm (12–16 in) centre to centre. Diagonal and commercial decks usually need about 300 mm (12 in) or less. Always use your product’s figure.
Do you need to leave gaps between composite deck boards?
Yes. Side gaps (usually set by hidden clips) let water drain and air flow, and end gaps allow the boards to expand and contract with temperature.
Can you install composite decking directly on concrete?
Not directly. Use a frame on adjustable pedestals or packers, keep the frame off the slab, and make sure water can drain and air can circulate underneath.
Do hidden fasteners work with all composite boards?
Only with grooved boards designed for them. Solid-edged boards, edge boards and stairs usually need face screws.
Can I install composite decking myself?
Many homeowners with basic carpentry skills install ground-level composite decks themselves. Raised decks, balconies and decks attached to a building are better left to a professional, and may need approval.
Ready to Build?
- See our composite decking range and matching accessories.
- Still choosing boards? Read our composite decking buying guide.
- Contractors and distributors: request pricing and installation documents for your project.